

AccuRanker에서 DashThis로 데이터 가져오기
마지막 업데이트 2023년 11월 24일 금요일
AccuRanker에서 DashThis로 데이터를 가져오려면 어떻게 해야 하나요?
대시디스는 다양한 마케팅 채널의 실적에 대한 데이터를 표시할 수 있는 업계 최고의 마케팅 대시보드입니다.
이 가이드에서는 통합이 가능하기 전에 시작할 수 있도록 AccuRanker 데이터를 DashThis로 수동으로 가져오는 방법에 대해 설명합니다.
기억하세요: 대시디스와 액큐랭커 계정이 필요합니다. 두 도구 모두에 대한 경험이 있는 것이 좋습니다.
**대시히스와 관련된 추가 질문은 대시히스 지원 전문가에게 문의하시기 바랍니다. **
1단계)
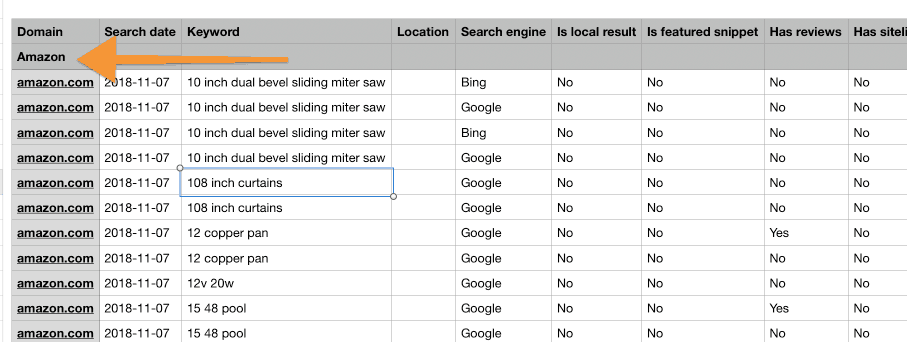
보고서를 생성하고 보고서 유형으로 CSV를 선택하여 AccuRanker에서 CSV 파일을 다운로드합니다.

파일을 준비합니다: CSV 파일을 다운로드한 후 고객 ID가 있는 행을 삽입하기만 하면 됩니다. 이 상자는 대소문자를 구분하므로 매번 같은 방식으로 이름을 작성해야 합니다.
2단계)
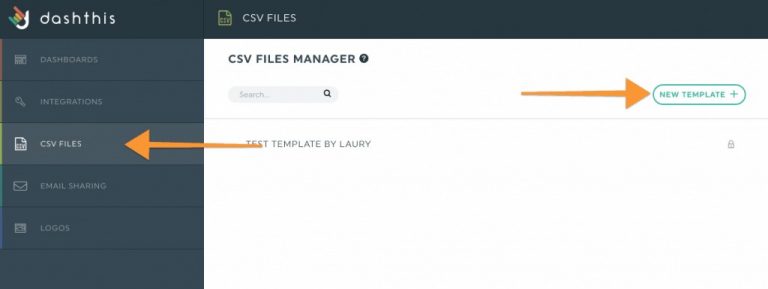
DashThis에 로그인하여 CSV 템플릿을 생성합니다.
CSV 파일을 선택하고 새 템플릿을 추가합니다. 그런 다음 AccuRanker에서 CSV 파일을 업로드합니다.
3단계)
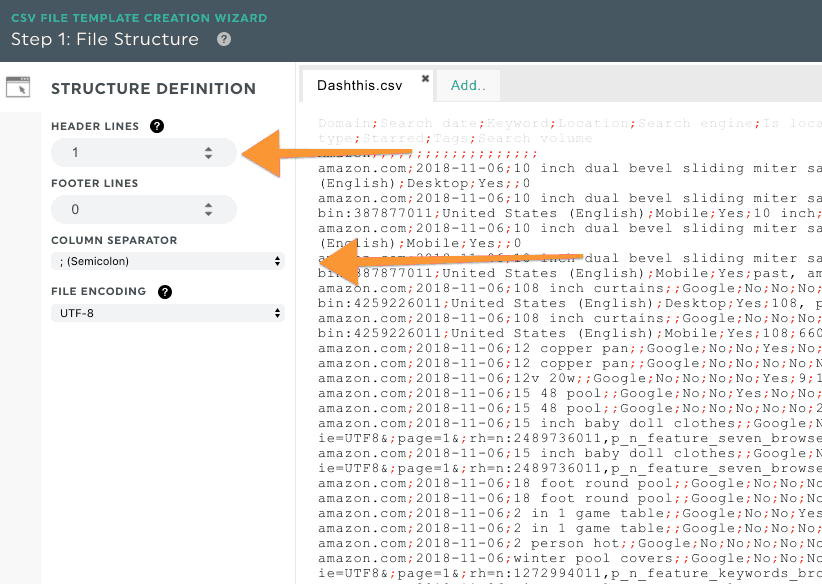
아래 스크린샷의 간단한 단계에 따라 템플릿을 설정합니다.
머리글 라인 아래에서 1을 선택합니다.
바닥 글 줄이 0으로 유지되는지 확인합니다.
열 구분 기호를 세미콜론으로 변경합니다.
날짜 섹션에서 열을 유형으로 선택하고 열 2를 선택합니다.
날짜 형식을 yyyy-mm-dd로 변경합니다.
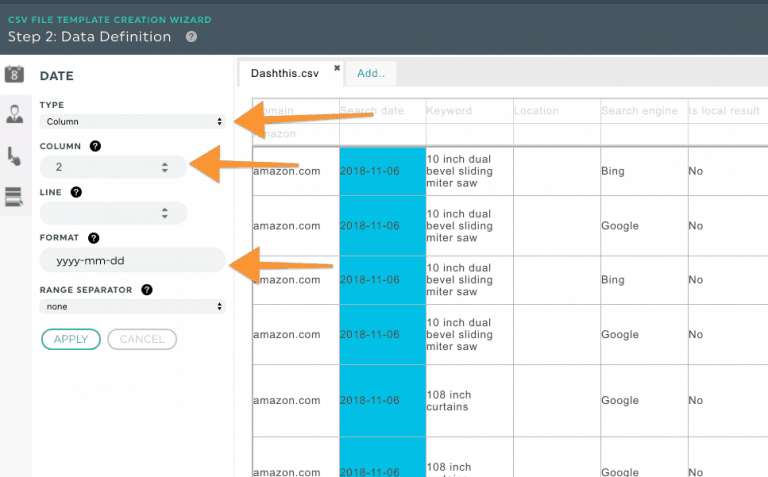
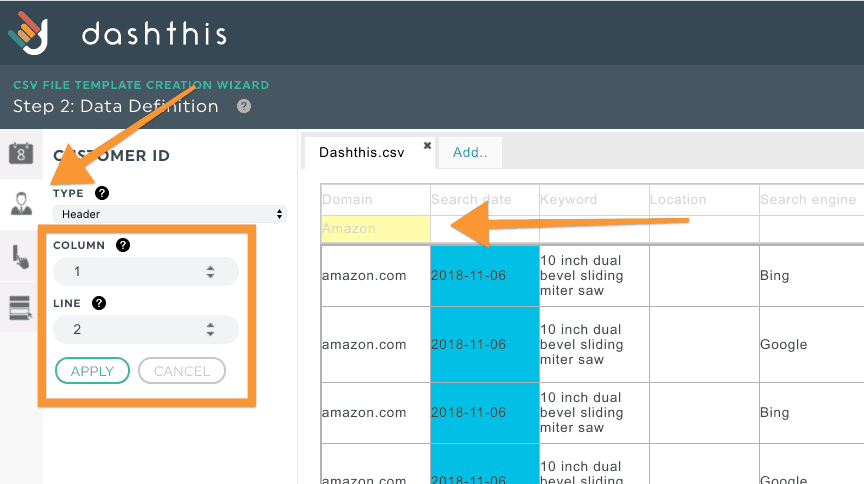
이제 고객 ID를 찾을 차례입니다. 위의 단계를 수행했다면 열 1, 줄 2에 있어야 합니다.
4단계)
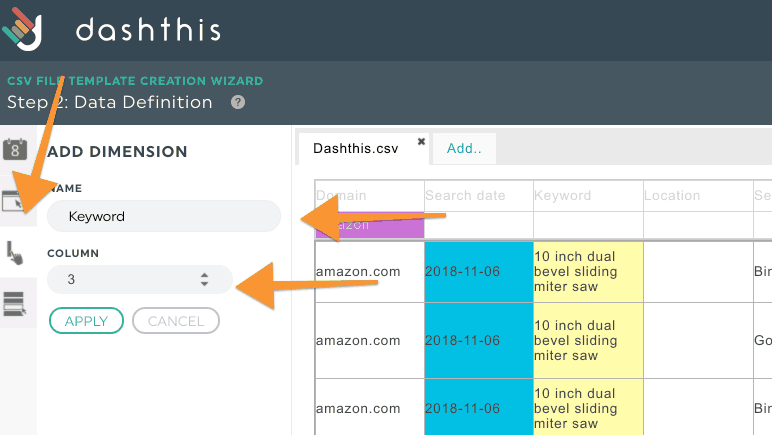
차원 및 메트릭을 추가합니다.
이 예에서는 차원으로 키워드 열을 추가합니다.
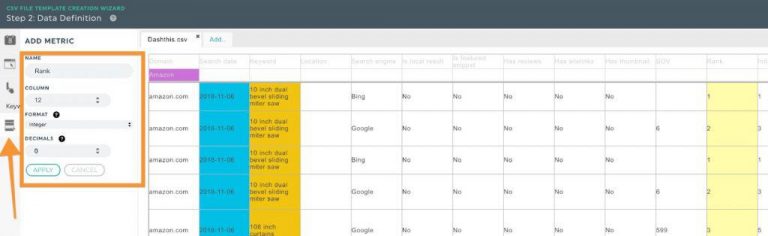
여러 메트릭을 추가할 수 있으며, 이 예에서는 Rank를 메트릭으로 선택했습니다.
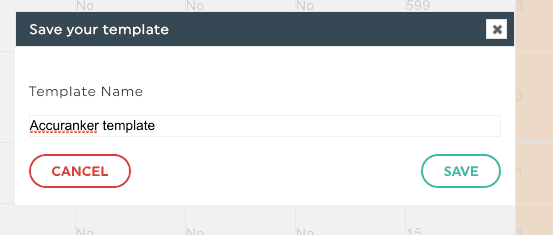
템플릿에 이름을 지정하고 저장합니다.
더 보기