구글 검색 콘솔에 연결
마지막 업데이트 2023년 11월 24일 금요일
내 웹사이트의 구글 서치 콘솔을 AccuRanker에 연결하려면 어떻게 해야 하나요?
구글 애널리틱스와 함께 AccuRanker는 추가 데이터를 제공할 수 있습니다. 여기에는 키워드별 "키워드 잠재력" 및 "예상 월간 방문자 수"가 포함됩니다.
아래 단계는 구글 서치 콘솔과 애큐랭커를 연결하는 방법을 설명합니다.
1단계)
해당 도메인의 개요 섹션으로 이동합니다.
2단계)
도메인 설정
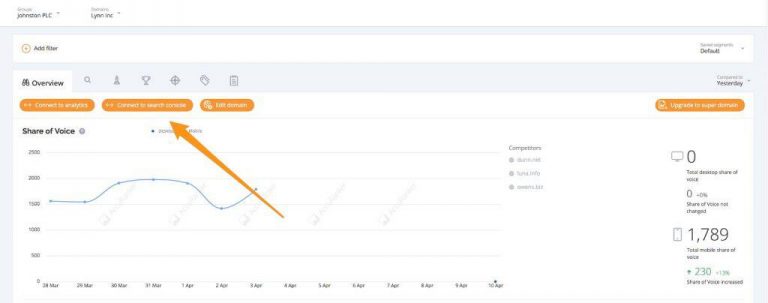
주황색 버튼을 클릭합니다: "검색 콘솔에 연결" 버튼을 클릭합니다.
중요 참고: 첫 번째 Google 계정을 AccuRanker에 연결하면 시스템이 자동으로 4단계로 이동합니다.
이 가이드를 따르는 신규 사용자도 동일하게 수행해야 합니다.
3단계)
구글 서치 콘솔에 연결
구글 서치 콘솔 계정에 설명을 입력하고 드롭다운 메뉴에서 올바른 구글 계정을 선택합니다.

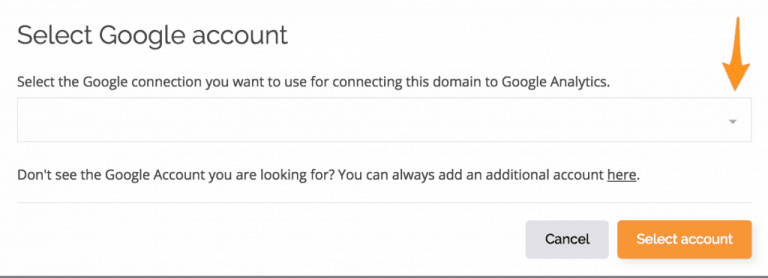
원하는 Google 계정이 목록에 없는 경우 '여기'에 있는 링크를 클릭합니다:

그런 다음 주황색 '계정 선택' 버튼을 클릭합니다.
4단계)
새 Google 계정에 연결하기
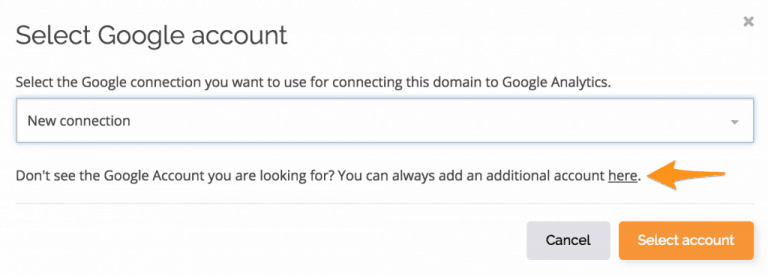
Google 계정에 대한 설명을 작성하고 버튼을 클릭합니다: "연결 추가" 버튼을 클릭합니다.
5a단계)
계정 선택
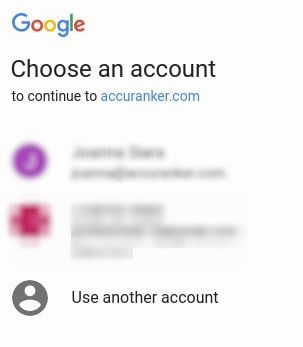
Google 계정에 로그인하지 않은 경우 로그인하라는 메시지가 표시됩니다.
여러 개의 Google 계정을 관리하는 경우 올바른 계정을 선택해야 합니다.
5b단계)
환영 페이지
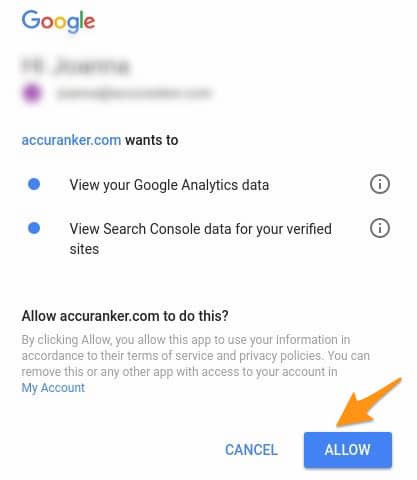
"허용"이라고 표시된 버튼을 클릭합니다.
6단계)
올바른 도메인 선택
사용하려는 도메인을 선택한 다음 "선택"이라고 표시된 버튼을 클릭합니다.
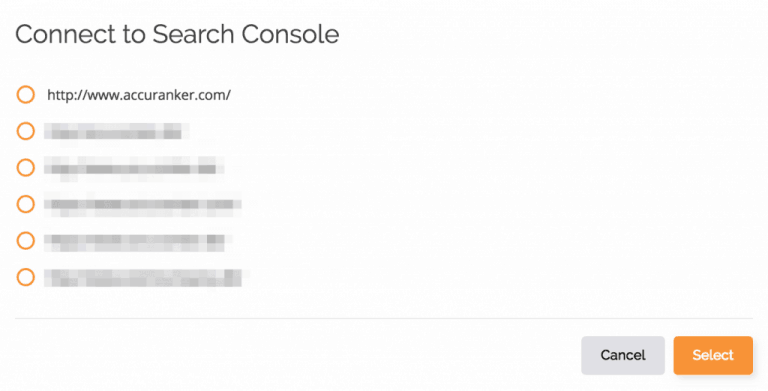
그러면 구글 서치 콘솔이 통합됩니다.
이제 키워드를 AccuRanker로 가져 오라는 메시지가 표시됩니다:
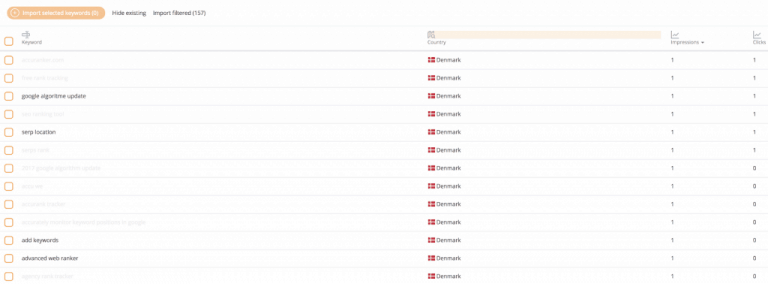
가능하면 모든 키워드를 가져오는 것이 좋습니다. 이렇게 하면 온라인 상태를 가장 정확하게 표현할 수 있습니다.
선택적으로 가져올 때는 다양한 필터로 정렬하여 가장 중요한 키워드(예: 검색량, 트래픽, SERP 기능)를 확인한 후 해당 URL에 트래픽을 제공하는 키워드를 가져옵니다.
방문자 및 잠재고객
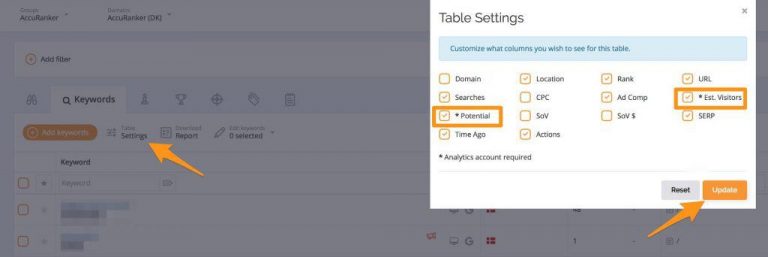
구글 애널리틱스와 구글 검색 콘솔이 모두 연결되면 아래 스크린샷과 같이 테이블 설정에서 잠재 방문자 및 예상 방문자 열을 활성화할 수 있습니다.
더 보기